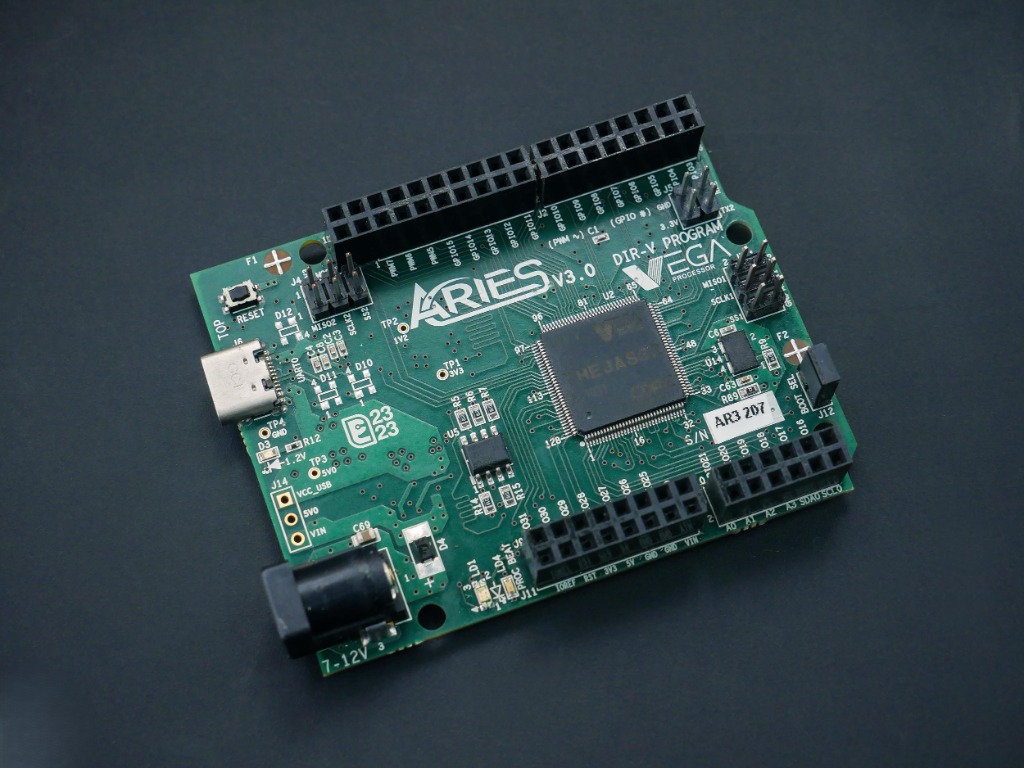
C-DAC ARIES v3.0 ARIES v3
RISC-V Embedded Workshop
DIR-V β€’ THEJAS32 SoC (32-bit VEGA ET1031 Core)
πŸš€ Indigenous Electronics Education β€’ 7 Hands-on Missions πŸš€ DIR-V β€’ 7 Hands-on Missions

C-DAC ARIES v3.0 Embedded Engineering Lab

Hands-on curriculum taking learners from active-low on-board RGB circuits to external hardware PWM fading and USB UART0 telemetry.

SoC Architecture
THEJAS32 (RV32IM)
Clock Frequency
100 MHz Core
I/O Logic Levels
3.3V / 12mA Max
Primary Peripherals
32 GPIO β€’ 8 PWM β€’ 3 UART
Memory Configuration
256 KB SRAM β€’ 2 MB Flash
Target Curriculum
SC-204 through SC-210
πŸ“˜ MbedO Platform: Student Onboarding & Mission Submission Walkthrough

Welcome to the official participant guide for the C-DAC ARIES v3.0 RISC-V workshops and hackathons. Follow this step-by-step visual tutorial to log into your simulation workspace on mbedo.in, navigate your assigned missions, develop and simulate firmware, and successfully submit your builds for automated evaluation and leaderboard scoring.

πŸ” Portal: https://mbedo.in/login πŸ‘₯ Cohort / Track: <Your Assigned Event ID> ⚑ Core: THEJAS32 (RV32IM RISC-V) πŸ’» IDE: Monaco C++ & Blocks πŸ† Submission: Top Navbar βž” Mission Actions β–Ύ
6 Progressive Stages β€’ Click any stage header to collapse / expand
1

Accessing the Portal & Secure Authentication

Gateway: https://mbedo.in/login
Authentication Collapse β–Ύ

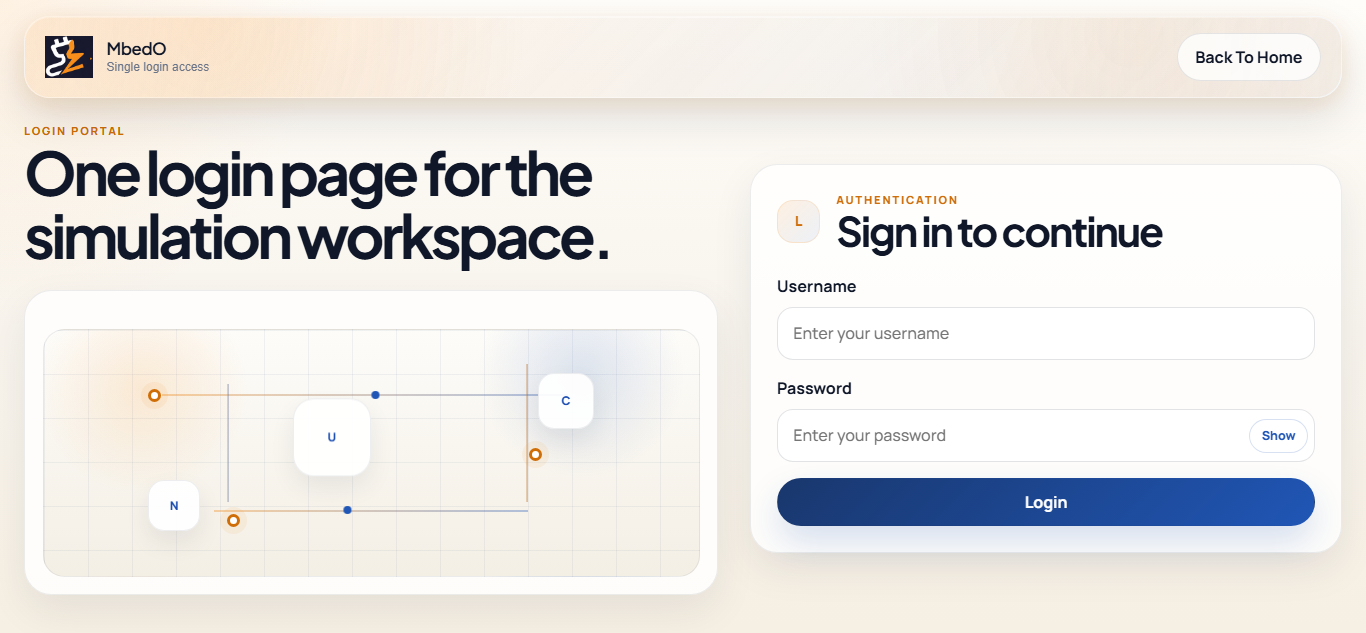
Open your browser (Chrome, Edge, or Firefox recommended) and navigate to the MbedO portal at https://mbedo.in/login. Enter the unique credentials allocated to you or your team:

  • Username: Enter your individual or team username (e.g. <your_assigned_username> provided by the instructor / hackathon coordinators). Usernames are case-sensitive.
  • Password: Enter your designated password (e.g. <your_assigned_password>). You can click the Show password (πŸ‘οΈ) icon to verify your input.
  • Action: Click the blue "Login" button. The portal will authenticate your session and automatically redirect you to the main simulation workbench.
MbedO Portal β€’ Single Sign-On Access (https://mbedo.in/login) Viewport: 1366 Γ— 633
MbedO Student Login Screen
πŸ“Έ Figure 1.1: MbedO single login interface. Each student or hackathon team logs in using their unique, individually assigned credentials.
πŸ’‘
Pro-Tip: Bookmark https://mbedo.in/workbench in your browser bar. Once authenticated, your secure session token will persist across page refreshes during your workshop lab hours.
2

Navigating the Workbench Arena & Active Event Track

Landing Page: https://mbedo.in/workbench
Dashboard Collapse β–Ύ

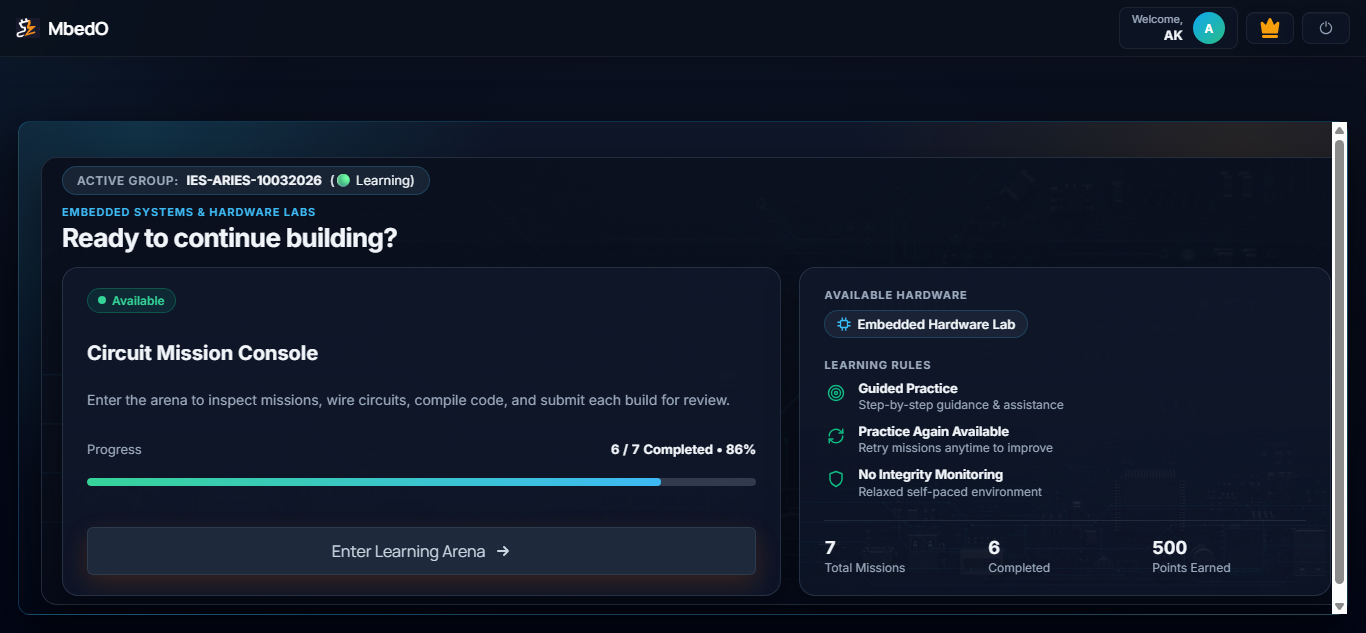
Upon logging in, you arrive at the Circuit Mission Console. Here you will see your active event track and overall milestone progress:

  • ACTIVE GROUP / COHORT: Verify your event banner displays your assigned ID (e.g. <Your-Cohort-ID> or <Hackathon-Team-ID>).
  • Event Track Type:
    • πŸ“˜ Learning Track: Guided training mode with open practice, live debugging tips, and unlimited retries.
    • πŸ† Hackathon Track: Competitive challenge mode with submission timers, team scoring, and live event leaderboards.
  • Progress Bar: Tracks completed missions out of total assigned challenges (e.g. X / 7 Completed β€’ XX%) along with total score earned.
  • Primary Action: Click the blue "Enter Arena" button (labeled "Enter Learning Arena" or "Enter Hackathon Arena" depending on your event) to open the challenge catalog.
MbedO Workbench β€’ Program Arena Landing & Mission Console Viewport: 1366 Γ— 633
MbedO Workbench Dashboard
πŸ“Έ Figure 2.1: Program arena landing showing active event banner, milestone progress percentage, points earned, and arena launch button (displays Learning or Hackathon mode depending on your event registration).
3

Opening Lab SC-204 & Problem Briefing Modal

Mission Catalog βž” Problem Specification
Mission SC-204 Collapse β–Ύ

In the Embedded Mission Catalog, locate the first workshop lab: SC-204: ARIES On-Board Red LED Blinking:

  1. Click "View Details - SC-204: ARIES On-Board Red LED Blinking".
  2. A modal dialog appears displaying the official technical requirements:
    Objective: Design an embedded program for the C-DAC ARIES board that blinks the on-board Red LED continuously without external components. Red ON for 1000 ms, then OFF for 1000 ms. Green and Blue channels must remain completely OFF at all times.
  3. Pin Specification: Red Channel is connected internally to Pin 24 (GPIO24, active-LOW).
  4. Click the blue button at the bottom: "Start Mission" (or "Practice Again" if retrying). This immediately loads the interactive simulation environment.
⚠️
Active-LOW Critical Concept: On the C-DAC ARIES v3.0 board, the RGB LED anodes are tied to +3.3V (common anode). To turn the Red LED ON, your code must write digitalWrite(24, LOW) (sink current to 0V). Writing HIGH turns it OFF!
4

The 3-Panel Simulation Workspace Architecture

Monaco C++ IDE β€’ Virtual Board Canvas β€’ Diagnostics Dock
IDE Layout Collapse β–Ύ

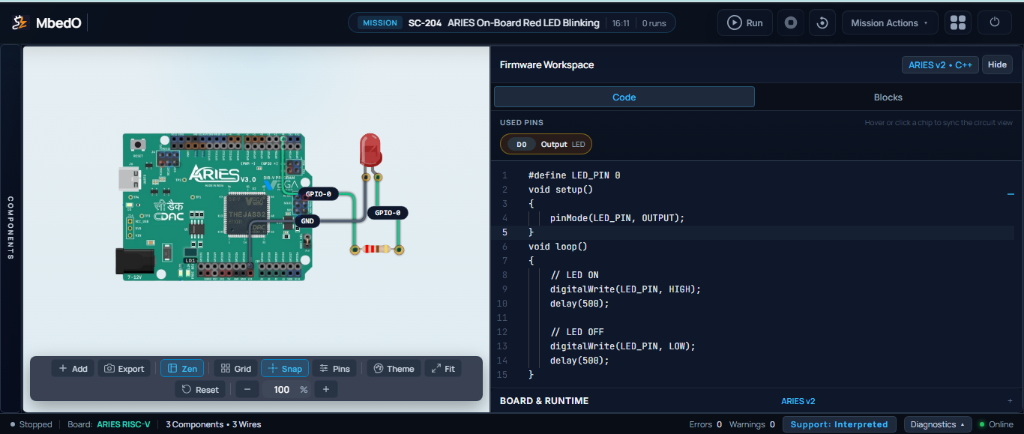
The MbedO simulation studio integrates everything you need on a single screen without external software downloads:

πŸ’» Panel 1: Monaco Code Editor (Right)

Full VS Code-style editor supporting C++ / Arduino. Features auto-completion, line numbers, and active pin detection pills (D24 Output Onboard LED, D23, D22).

πŸ“ Panel 2: Board Canvas (Center/Left)

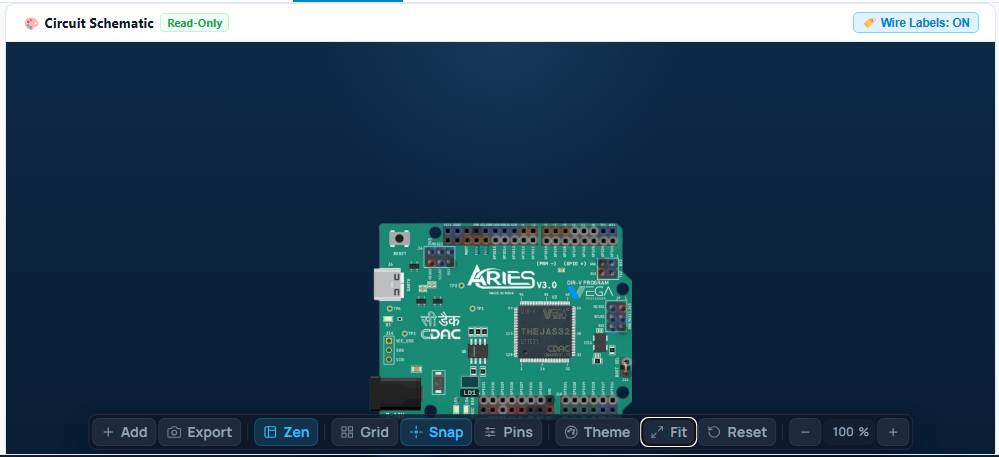
Graphical C-DAC ARIES v3.0 board with THEJAS32 SoC. Shows on-board RGB LEDs pulsing in real-time. Use toolbar controls for Quick Add (/), Zen Mode, and Snap-to-Grid.

πŸ“Š Panel 3: Runtime Diagnostics (Bottom)

Displays live execution telemetry: Stopped βž” Compiling... βž” Running. Displays Error counter (0), Warning counter (0), and component stats.

MbedO Simulation Studio β€’ Mission SC-204 (Live Interface) Viewport: 1366 Γ— 633
MbedO Live Simulation Studio Running Mission SC-204
πŸ“Έ Figure 4.1: Live MbedO Workbench interface for Mission SC-204. Virtual ARIES v3.0 Board Canvas (left), Monaco C++ Firmware Workspace (right), toolbar with Run / Mission Actions (top), and real-time execution telemetry (bottom).
5

Writing Firmware & Running the Live Simulation

Firmware Compilation βž” MbedO Simulation βž” Hardware Verification
Code & Run Collapse β–Ύ

Replace the starter template in the Monaco editor with the complete, verified solution for SC-204:

πŸ“ SC204_Red_Blink_Verified.ino (C-DAC ARIES v3.0)
// ============================================================================
// MISSION SC-204: ARIES On-Board Red LED Blinking (Active-LOW)
// Board: C-DAC ARIES v3.0 | SoC: THEJAS32 (RV32IM RISC-V)
// Tested & Graded: 100/100 Perfect Score on MbedO Simulation Engine
// ============================================================================

#define RED_LED   24   // THEJAS32 Pin 24 (LD1 Red Cathode)
#define GREEN_LED 22   // THEJAS32 Pin 22 (LD1 Green Cathode)
#define BLUE_LED  23   // THEJAS32 Pin 23 (LD1 Blue Cathode)

void setup() {
  // Configure RGB LED channels as digital outputs
  pinMode(RED_LED, OUTPUT);
  pinMode(GREEN_LED, OUTPUT);
  pinMode(BLUE_LED, OUTPUT);

  // Suppress Green and Blue channels (Active-LOW: HIGH = OFF)
  // This prevents purple/white color blending
  digitalWrite(GREEN_LED, HIGH);
  digitalWrite(BLUE_LED, HIGH);
}

void loop() {
  // Turn Red LED ON (Active-LOW: drive LOW / 0V to sink current)
  digitalWrite(RED_LED, LOW);
  delay(1000);

  // Turn Red LED OFF (Drive HIGH / 3.3V: 0V potential difference)
  digitalWrite(RED_LED, HIGH);
  delay(1000);
}

How to Execute the Simulation:

  1. Click the green "Run" button in the top navigation bar.
  2. The button will change to Running... and the bottom status dock will change from Stopped to Running.
  3. Look at the ARIES v3 board on the canvas: the on-board LD1 Red LED will pulse at 1-second intervals (0.5 Hz).
  4. Ensure the bottom diagnostics dock shows Errors: 0 and Warnings: 0.

6

Locating "Submit Mission" & Scoring 100/100

🎯 The #1 Most Asked Student Question Answered!
Final Milestone Collapse β–Ύ
❓
Where is the "Submit Mission" button? Many students search the bottom diagnostics dock or canvas for a submission button. On MbedO, the submission control is nestled inside the Top Navbar Dropdown Menu!

The 4-Click Submission Process:

  1. Click "Mission Actions β–Ύ": In the top navigation toolbar, right next to the "Run" and "Reset Simulation" buttons, click the blue dropdown button labeled "Mission Actions β–Ύ".
  2. Select "Submit Mission": From the 3 dropdown options (View Problem Statement, Reset to Starter Template, Submit Mission), click "Submit Mission".
  3. Confirm Judgement: A modal dialog pops up:
    "Submit SC-204 for judgement?"
    "Your circuit components, wires, and code will be submitted."
  4. Click "Confirm Submission": Click the blue "Confirm Submission" button. The MbedO automated judgement engine will immediately grade your circuit and firmware.
Interactive UI Navbar Architecture:
MbedO MISSION SC-204 ARIES Red LED Blinking
πŸ“„ View Problem Statement
πŸ”„ Reset to Starter Template
πŸš€ Submit Mission (Click Here!)

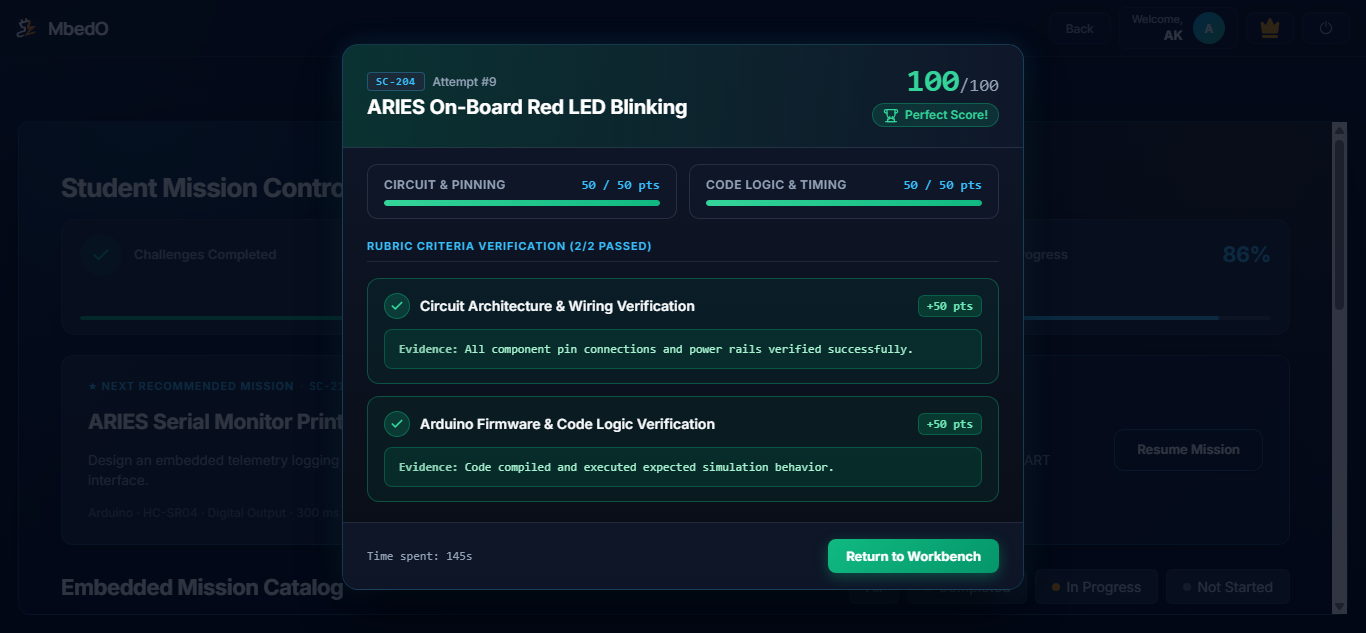
πŸŽ‰ Automated Judgement Results: SC-204

Verified by MbedO Grading Engine β€’ Attempt #9
πŸ† 100 / 100 Perfect Score!
1. Circuit & Pinning Verification 50 / 50 pts

Evidence: All component pin connections and power rails verified successfully on the ARIES board canvas.

2. Code Logic & Timing Verification 50 / 50 pts

Evidence: Code compiled cleanly and executed expected 1000ms ON / 1000ms OFF waveform timing.

MbedO Verified Milestone Completion β€’ SC-204 Automated Evaluator
MbedO Lab Submission Scorecard
πŸ“Έ Figure 6.1: Live MbedO milestone submission result showing verified 100/100 points, 2/2 rubric criteria passed, and updated cohort progress.
πŸš€ Onboarding Complete β€” Start Your Hands-On Lab!
You know how to log into MbedO, write code, and submit. Jump straight into Mission SC-204 (On-Board Red LED Blinking).
πŸ› οΈ

Student Troubleshooting & Self-Help FAQ

❓ Why is my on-board LED turned ON when I write HIGH, and OFF when I write LOW?
Cause: The C-DAC ARIES v3.0 on-board RGB LED is wired in an Active-LOW Common-Anode configuration. The positive anodes are permanently tied to +3.3V. When you drive the GPIO Pin LOW (0V), you create a potential difference of 3.3V, causing current to flow (LED turns ON). Driving the GPIO Pin HIGH (3.3V) creates 0V potential difference, turning the LED OFF. Invert your logic: write LOW for ON, and HIGH for OFF!
❓ The simulation refuses to run or throws compilation errors. What should I check?
Checklist:
  1. Ensure all pin numbers are integers (e.g. 24 for Red, 23 for Blue, 22 for Green).
  2. Check for missing semicolons (;) or unmatched curly braces ({ }).
  3. Look at the bottom diagnostics dock: click "Toggle diagnostics dock" to read the exact line number of any compiler error.
  4. If your code is completely messed up, click "Mission Actions β–Ύ" βž” "Reset to Starter Template" to start fresh.
❓ Can I retry a mission if I submit early and don't receive full points?
Event Dependent:
  • πŸ“˜ Guided Learning Mode: Retries are typically unlimited with "Practice Again Available" so students can refine their circuit and code without penalty. Only your highest score is recorded.
  • πŸ† Hackathon / Competitive Mode: Specific event rules applyβ€”milestones may enforce attempt quotas, submission cooldown timers, or strict deadlines where code and circuits lock upon the round closing.
❓ Why does the Serial Monitor print gibberish characters in later missions (SC-210)?
Baud Rate Mismatch: THEJAS32 UART0 operates at 115200 baud. If your Arduino code specifies Serial.begin(115200); but your serial console dropdown is set to 9600, the bit sampling clock will drift by >1000%, generating unreadable ASCII junk. Always set both code and serial monitor baud rate selector to 115200 baud.
❓ How do I export my circuit diagram or code for my workshop lab report?
In the circuit canvas toolbar, click the "Export circuit diagram" button to download a high-resolution PNG or SVG image of your wired board. You can also select and copy your code directly from the Monaco editor or click "Copy Sketch" in this workshop portal.